How to Manage Your Alder Seedlings
NWH is proud to partner with you in helping to restore the Alder population in the Pacific Northwest.
This guide provides a roadmap for successful seedling growth, making the most of your contribution to a resilient and diverse forest landscape. Together we can help Alder trees flourish!
This guide provides a roadmap for successful seedling growth, making the most of your contribution to a resilient and diverse forest landscape. Together we can help Alder trees flourish!
Site Selection
Sun Exposure:
Red Alder thrives in full sun or partial shade. Avoid areas with dense canopy cover that impedes light.
Soil Type:
Opt for well-drained, fertile soils that retain moisture. Red to orange mineral soil, sandy loam or silt loam compositions are ideal. Avoid waterlogged sites that hinder root system development.
Elevation:
Plant below 1,500 ft in Washington & northern Oregon and below 3,000 ft. in southern Oregon.
Spacing:
Aim for a spacing of 8-10 ft between seedlings to facilitate optimal growth. Red Alder are self-pruning under the competitive conditions that come with close planting.
Planting Technique
Timing:
Plant during the cool, moist seasons: early spring (March-April) or early fall (September-October). Alder have thin bark and are susceptible to frost.
Handling:
Use extra care as Alder stems are brittle and buds can be easily knocked off.
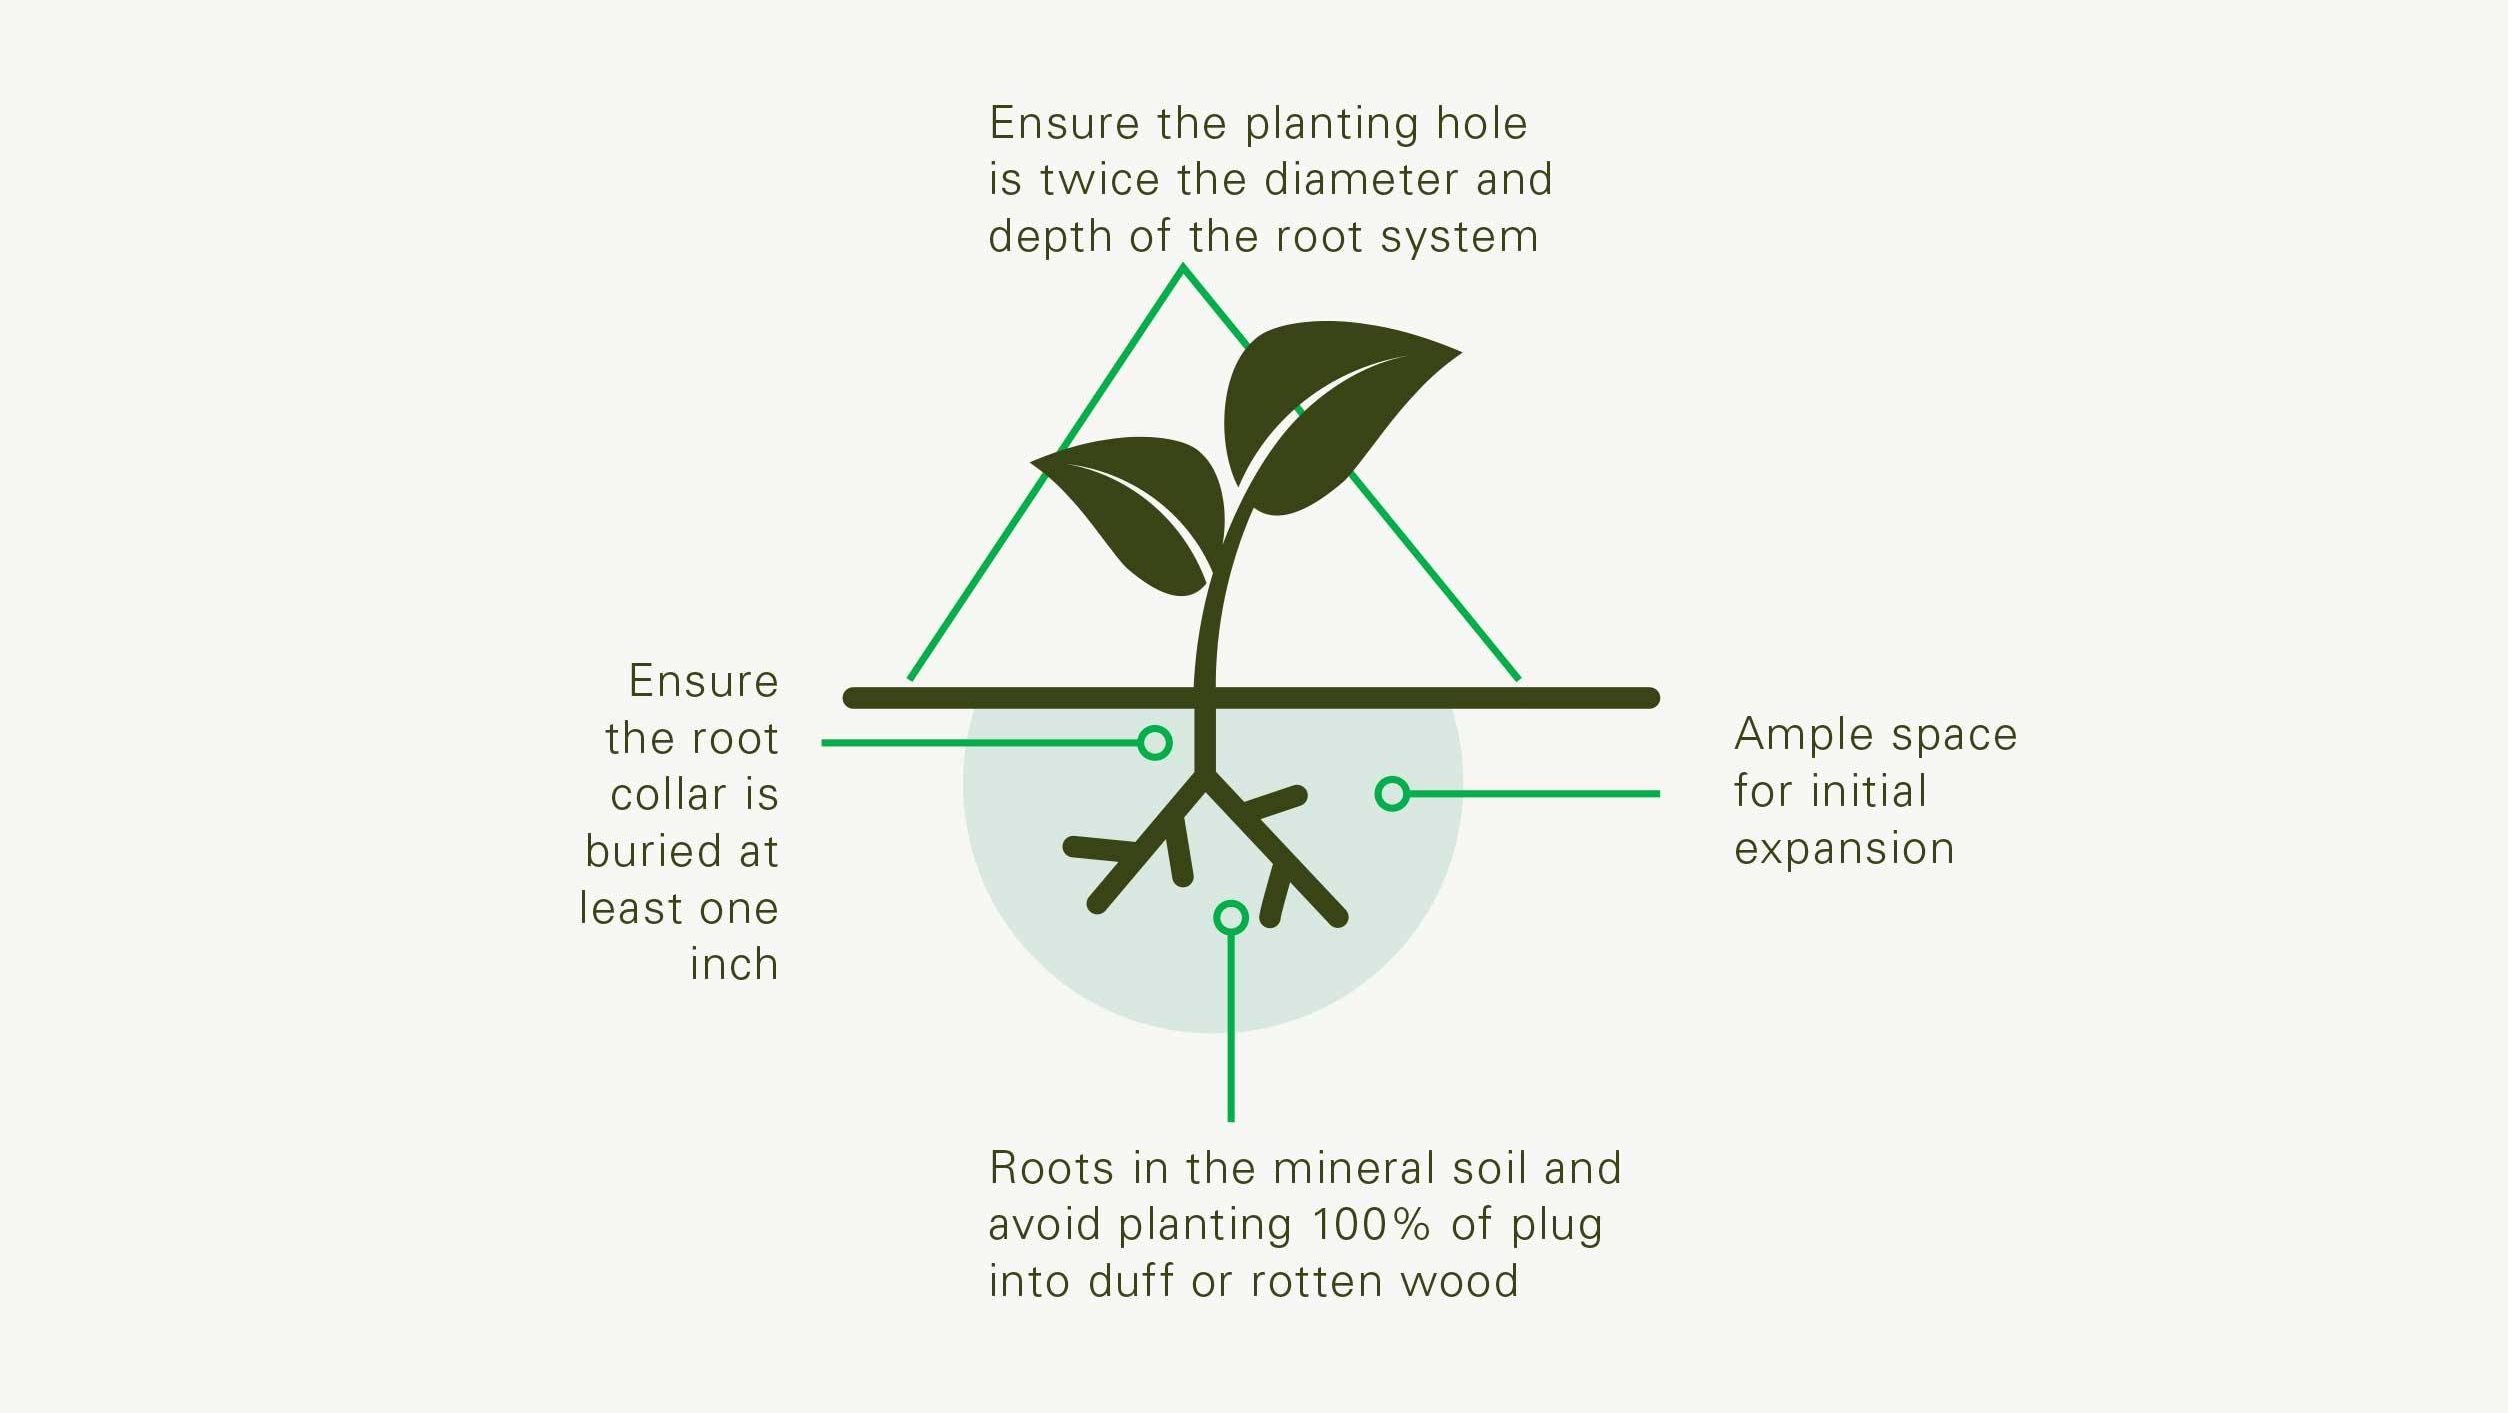
Root System Accommodation:
Dig a planting hole twice the diameter and depth of the root system, ensuring ample space for initial expansion. Loosen the soil at the bottom to encourage root penetration.
Planting Depth:
Make certain the roots get into the mineral soil and avoid planting 100% of plug into duff or rotten wood. The planting roots should not be scalped more than necessary to open the hole.
Timing:
Plant during the cool, moist seasons: early spring (March-April) or early fall (September-October). Alder have thin bark and are susceptible to frost.
Handling:
Use extra care as Alder stems are brittle and buds can be easily knocked off.
Root System Accommodation:
Dig a planting hole twice the diameter and depth of the root system, ensuring ample space for initial expansion. Loosen the soil at the bottom to encourage root penetration.
Planting Depth:
Make certain the roots get into the mineral soil and avoid planting 100% of plug into duff or rotten wood. The planting roots should not be scalped more than necessary to open the hole.
Root Collar Positioning:
Ensure the root collar is buried at least one inch.
Mulching:
Apply a 2-3 inch layer of organic mulch around the base of the seedling to retain moisture and suppress weeds.
Watering:
Water the seedling thoroughly after planting. Maintain consistent moisture during the first growing season, especially during arid periods.
Post-Planting Care
Animal Protection:
Consider fencing or tree tubes if necessary to protect seedlings from browsing animals, particularly during the vulnerable early stages.
Weed Control:
Implement strategies to control competing vegetation around seedlings for the first few years, allowing them to establish strong root systems and maximize resource acquisition.
Monitoring:
Regularly assess seedlings for signs of stress, such as discoloration, wilting, or insect damage. Address any issues promptly to ensure optimal growth.